 Save
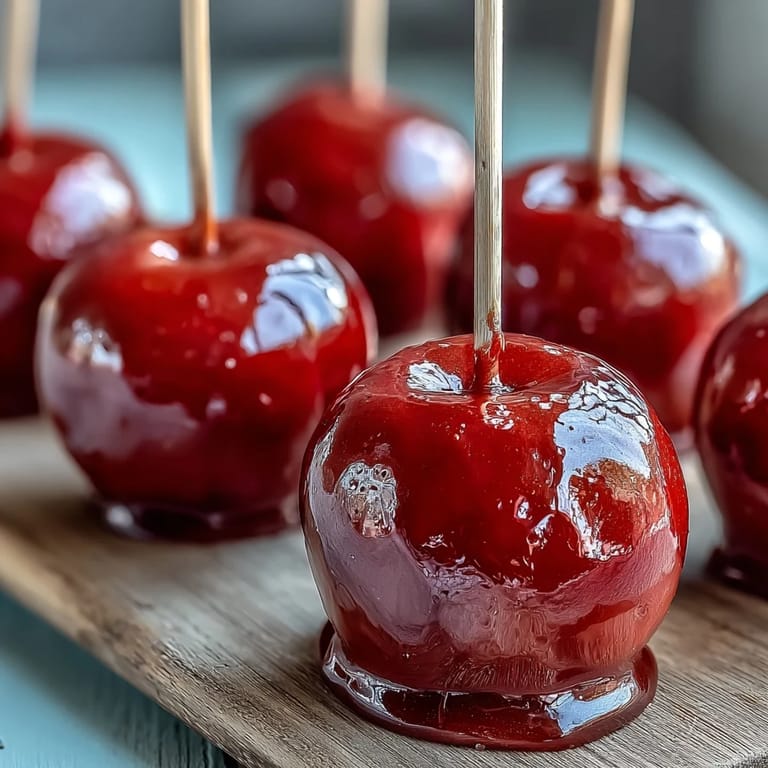
Save My daughter came home from a school fair with sticky fingers and pure joy written all over her face, clutching a candy apple like it was treasure. That afternoon, I decided we'd make them together, and watching her eyes light up as the red syrup transformed plain apples into something magical was worth every careful dip into that bubbling pot. Now whenever I see those wooden sticks in the cupboard, I'm transported back to that kitchen moment where something so simple became a memory we still talk about.
I'll never forget the birthday party where I brought three dozen of these thinking it was plenty—they disappeared in minutes, and parents were asking for the recipe before cake was even served. One mom later told me her shy son actually engaged with other kids at the party because they were all crowded around comparing who had the shiniest coating. That's when I realized these weren't just candy apples; they were conversation starters that somehow made shy kids brave.
Ingredients
- Small apples (Gala or Fuji, or crabapples): The smaller varieties work best because they're easier to coat evenly and more fun to bite into—plus they look infinitely cuter on sticks.
- Granulated sugar: This is your base for that crystal-clear, shiny coating that catches the light beautifully.
- Light corn syrup: This prevents crystallization and keeps your candy shell smooth and glossy rather than grainy and dull.
- Water: Acts as the vehicle for dissolving the sugar and reaching the perfect hard-crack consistency.
- Red gel food coloring: Gel holds its color better than liquid food coloring when mixed into hot candy, giving you that vibrant finish.
- Wooden sticks: Make sure they're food-grade and sturdy—flimsy sticks bend when you're dipping, which is incredibly frustrating mid-coat.
- Nonstick cooking spray or parchment paper: This prevents sticking and makes cleanup a breeze, which you'll appreciate when sugar hardens to your baking sheet.
Tired of Takeout? 🥡
Get 10 meals you can make faster than delivery arrives. Seriously.
One email. No spam. Unsubscribe anytime.
Instructions
- Prepare your apples:
- Wash each apple thoroughly and dry them completely with a towel—moisture on the surface will prevent the candy from sticking properly. If using larger apples, halve them and carefully scoop out seeds with a melon baller before inserting the wooden stick firmly into where the stem was, making sure it's secure enough to handle the weight of wet candy.
- Set up your workspace:
- Line your baking sheet with parchment paper or a silicone mat and lightly spray or grease it—this is your landing pad where your freshly dipped apples will cool, and you want them sliding off effortlessly later. Having everything ready before you start the candy means you won't be frantically searching for supplies while molten sugar is cooling.
- Combine your candy ingredients:
- Pour sugar, corn syrup, and water into a medium saucepan and stir gently over medium heat until the sugar completely dissolves and the mixture looks clear. This gentle stirring phase is important because once you increase the heat, you'll stop stirring altogether to prevent crystallization.
- Bring to hard-crack stage:
- Increase heat to high and let the mixture boil without stirring—I know this feels wrong, but touching it now will ruin everything by creating sugar crystals. Watch your candy thermometer closely; you're aiming for exactly 290°F (143°C), which takes about 8 to 10 minutes and is when the candy will be hard and brittle once cooled.
- Add your color:
- Remove the pan from heat and carefully stir in the red gel food coloring until it's evenly distributed throughout—the color will deepen slightly as it cools, so don't be alarmed if it looks darker than you expected. Let it sit for just 30 seconds so the heat isn't quite so intense before you start dipping.
- Dip with confidence:
- Working quickly but carefully, grip each apple stick firmly and dip the apple into the candy coating with one smooth motion, then swirl gently to ensure even coverage. Lift it out, let the excess drip back into the pan for a few seconds, then place it on your prepared sheet and don't touch it again—patience here pays off.
- Cool completely:
- Let the candy apples rest at room temperature for about 10 minutes until the coating hardens into that satisfying, crackable shell. Resist the urge to refrigerate or move them around; the candy needs time to set undisturbed.
 Save
Save There was this one rainy Saturday when I made these with my niece, and she decided to add crushed rainbow cookies to hers before the candy set. When it hardened, it looked like she'd trapped edible confetti inside, and she wore that apple like a badge of honor, showing everyone her custom creation. That's when I understood that this recipe isn't just about following steps—it's about the moments where someone makes it their own.
The Science Behind the Shine
That gorgeous glossy finish comes from reaching exactly the right temperature where sugar molecules lock into a hard, transparent structure instead of crystallizing into something cloudy and dull. The corn syrup is doing crucial work preventing those unwanted crystals from forming, which is why skipping it or substituting honey always results in a disappointing, grainy coating. I learned this by experimenting too much, and honestly, the traditional formula exists because it's genuinely the best approach.
Customization Without Complications
While the basic red version is iconic, the real magic happens when you start playing with colors and coatings—I've made blue ones for a superhero party and green ones for Halloween without changing a single measurement. The beauty is that once your candy coating is ready, the customization happens in those precious seconds before it hardens, so you can make multiple batches in different colors using the same base recipe. Just remember that darker colors sometimes take slightly longer to dissolve into the hot candy, but patience rewards you with more even coloring.
Storage and Serving Strategy
These keep beautifully at room temperature in an airtight container for several days, and there's something nostalgic about pulling one out days later to find it still has that satisfying crunch. Never refrigerate them because the temperature change makes the candy shell sweat and turn sticky—room temperature is genuinely the best storage method, not a limitation. If you're making them for an event, prepare them no more than a day ahead so the apple inside stays fresh and the candy shell remains pristine.
- Store in an airtight container at room temperature away from humidity.
- If the candy ever gets sticky, your kitchen was too warm or humid when they cooled.
- These make beautiful gifts wrapped in cellophane with a ribbon tied around the stick.
 Save
Save These little candy apples have taught me that sometimes the most memorable treats aren't complicated—they're just made with intention and shared with people who matter. Every time I make them, I'm reminded that a moment in the kitchen can stick with someone far longer than the candy shell on an apple.