 Save
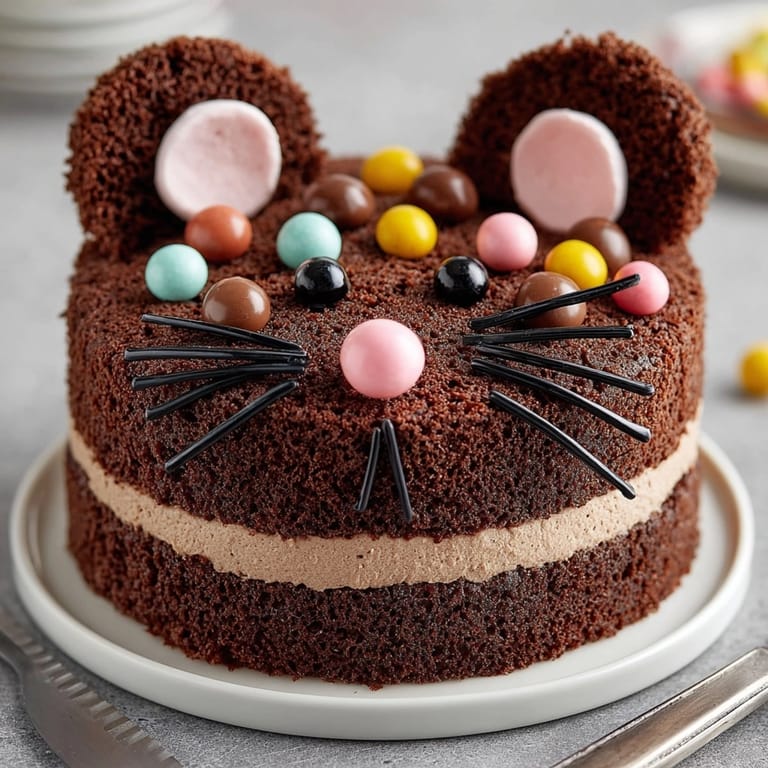
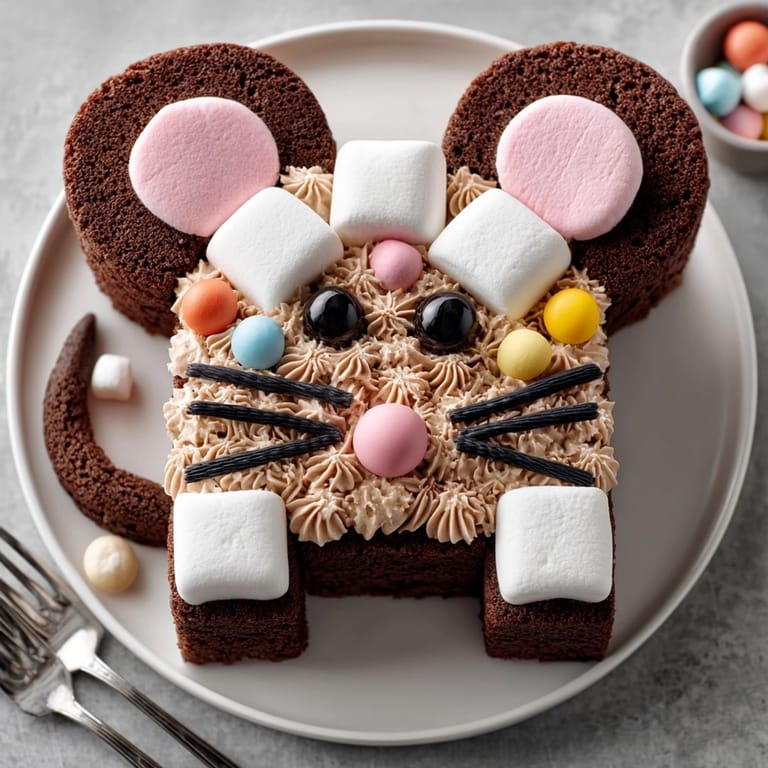
Save This silly rat-shaped birthday cake transforms ordinary chocolate cake into a whimsical creation that delights children and adults alike at themed parties. The combination of rich chocolate cake with creamy buttercream frosting creates the perfect canvas for crafting an adorable rodent that becomes the centerpiece of any celebration.
I first made this cake for my nephew's science-themed birthday party after he developed an obsession with his classroom pet rat. The squeals of delight when I brought it out made all the decorating work worthwhile, and now it's requested for various occasions beyond birthdays.
Ingredients
- All purpose flour: provides the perfect structure for a cake that needs to hold its shape during decorating
- Unsweetened cocoa powder: gives rich chocolate flavor without being overly sweet, allowing the frosting to shine
- Boiling water: might seem unusual but it blooms the cocoa powder, intensifying the chocolate flavor dramatically
- Room temperature butter: for buttercream ensures a silky smooth frosting that spreads easily for detailed decorating
- Large marshmallows: create perfect ears that hold their shape while being soft enough to eat with the cake
- Licorice laces or pretzel sticks: offer flexibility for creating realistic whiskers based on what you have available
Tired of Takeout? 🥡
Get 10 meals you can make faster than delivery arrives. Seriously.
One email. No spam. Unsubscribe anytime.
Instructions
- Prepare The Batter:
- Whisk together your dry ingredients first to ensure even distribution of leavening agents. When adding the boiling water at the end, pour it slowly while stirring to prevent cooking the eggs in the batter. The resulting mixture will seem unusually thin but creates an incredibly moist cake.
- Bake With Precision:
- Position both pans in the center of your oven for even heat distribution. The round pan might finish baking slightly before the loaf pan, so check each separately with a toothpick. Cool the cakes completely before attempting to carve or frost them to prevent crumbling.
- Create The Rat Shape:
- Use a serrated knife with a gentle sawing motion to shape the loaf cake into a pointed nose. Reserve the cut pieces for building up the haunches. Apply a thin crumb coat of frosting first, then chill for 15 minutes before the final frosting layer for professional results.
- Master The Details:
- Flatten the marshmallow halves slightly before attaching them as ears to help them stay in place. For the most realistic whiskers, insert licorice pieces directly into the cake rather than trying to attach them to the frosting. Position the eyes slightly to the sides rather than directly forward for a more authentic rodent appearance.
 Save
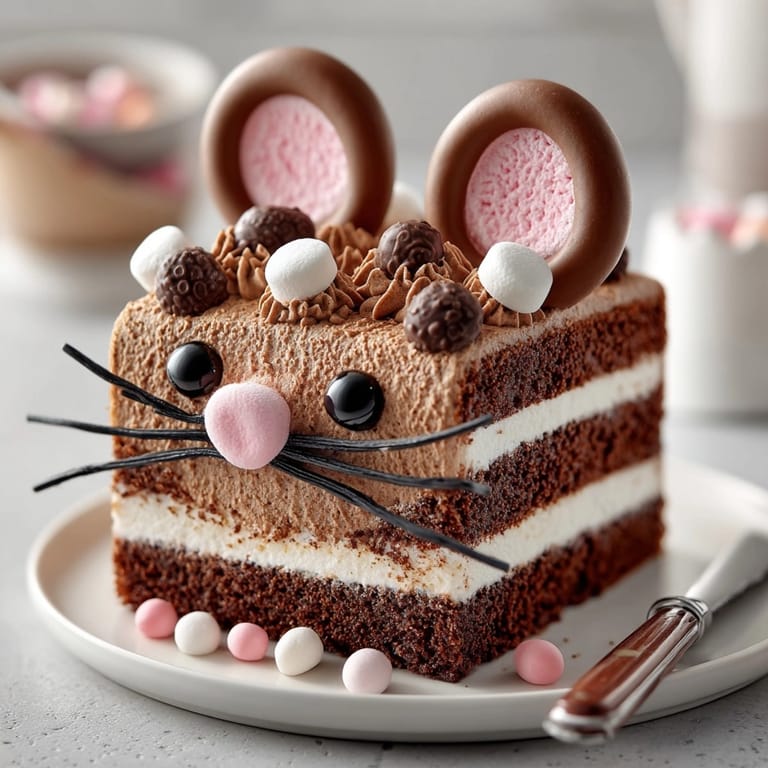
Save The marshmallow ears are my favorite element of this design. My daughter once insisted on helping place them, resulting in hilariously lopsided ears that made our rat look perpetually confused. We now intentionally make one ear slightly askew as our family's signature touch on this beloved cake.
Make Ahead Tips
This cake actually benefits from being made ahead. The flavors deepen overnight, and the assembled cake holds its shape better when chilled. Prepare the cake components up to two days before the event, then assemble and decorate the day before. Store in the refrigerator but bring to room temperature about 30 minutes before serving for the best texture and flavor.
Decoration Alternatives
Not all decorating ingredients are available everywhere, so flexibility is key. Instead of licorice for whiskers, you can use thin pretzel sticks, piped chocolate, or even slivered almonds. For a gray rat, add a small amount of black food coloring to vanilla buttercream until you achieve a light gray shade. Food-safe markers can add fine details like whisker dots or fur texture for advanced decorators.
Kid-Friendly Decorating
Transform this cake into a family activity by setting up a decorating station. Prepare the basic rat shape with frosting, then let children add pre-selected decorations like candy eyes, licorice whiskers, and sprinkles. This creates a memorable experience and takes pressure off achieving a perfect look. Keep wet paper towels nearby for quick finger cleanup between decorating steps.
Seasonal Adaptations
Spring birthday parties can feature a garden rat with buttercream grass and fondant vegetables. Summer celebrations work well with a beach rat wearing a tiny fondant sunhat or sunglasses. Fall parties can incorporate autumn colors with orange and yellow candies and cookie crumb dirt.
 Save
Save Allergy Accommodations
This versatile cake can be adapted for various dietary needs. For egg allergies, substitute each egg with 1/4 cup unsweetened applesauce. Dairy-free alternatives include plant-based milk and butter substitutes in equal measurements. For gluten sensitivities, a cup-for-cup gluten-free flour blend works beautifully, though you may need to add 1/2 teaspoon of xanthan gum if your blend doesn't include it. Always check candy decorations carefully for potential allergens, especially when preparing for children's parties.
Recipe FAQ
- → How do I shape the cake like a rat?
Use a round cake for the body and a loaf cake for the nose and haunches. Carve and attach pieces with buttercream, then cover and sculpt into a rat form.
- → What candies work best for decorating the face?
Marshmallows are perfect for ears, chocolate or edible eyes for the face, pink candies for the nose, and licorice or pretzel for whiskers and tail.
- → Can I use different cake flavors?
Absolutely! Vanilla, red velvet, or strawberry base can be substituted, though chocolate works well for a natural fur look.
- → How should I store the finished cake?
Keep it chilled in the refrigerator, especially if decorated in advance. Allow to come to room temperature before serving for the best texture.
- → Is it possible to make this gluten-free?
Yes, substitute the all-purpose flour with a gluten-free flour blend for an allergy-friendly version.
- → Are there tips for keeping the cake moist?
Ensure not to overbake, and wrap cooled cakes in plastic until assembly to retain moisture.