 Save
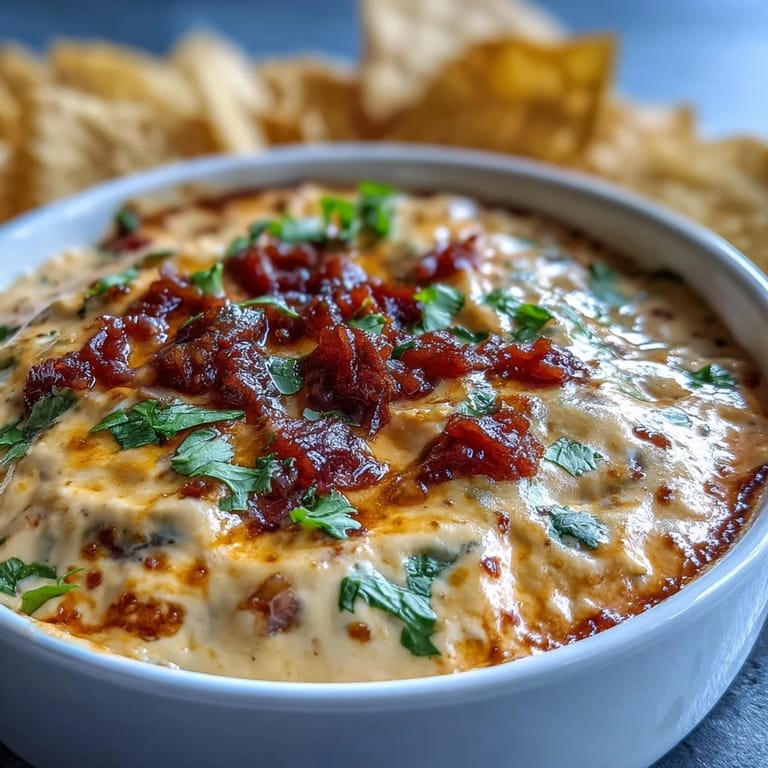
Save My friend Marcus always brings the same store-bought queso to parties, and one Super Bowl Sunday I decided to prove that homemade could be faster and infinitely better. Twenty minutes later, when people were actually fighting over the last chip instead of politely picking at a bowl, I knew something had clicked. This dip taught me that the best appetizers don't require hours of fussing—just good cheese, a little heat, and enough confidence to stir confidently while everyone watches.
I made this dip for my cousin's wedding shower, not knowing half the guests were lactose intolerant until someone asked if it had milk. The irony wasn't lost on me, but what mattered was watching the three people who could eat it lean back in their chairs with that satisfied look that means you've done something right. That's when I realized queso dip is less about the occasion and more about creating a moment where people stop talking and start reaching for another chip.
Ingredients
- Sharp cheddar cheese (2 cups): This is your backbone—sharp cheddar has enough personality to cut through the richness without tasting one-note, and it melts faster than mild varieties.
- Monterey Jack cheese (1 cup): Its mild, slightly sweet flavor balances the cheddar's punch and helps everything melt into that creamy dream texture.
- Whole milk (1 cup): This thins the mixture just enough so it stays pourable instead of becoming a cheese brick once it cools.
- Unsalted butter (2 tablespoons): Start your flavor foundation here—it's where the vegetables will begin to soften and release their sweetness.
- Cream cheese (2 tablespoons): The secret weapon that keeps the dip silky even if it sits for a while; it prevents the cheese from becoming stringy and separated.
- Jalapeño (1 small): Remove the seeds unless you want genuine heat that announces itself; the flavor stays even if the fire doesn't.
- Tomato (1 small): Seed it generously to avoid watery dip, then dice small so each chip catches a bit of brightness and acidity.
- Red onion (1/4 cup): Finely chop this so it softens into the background rather than creating crunchy surprises—though honestly, I don't mind when it stays textured.
- Garlic (2 cloves): Mince it fine and add it fast; thirty seconds is the sweet spot before it gets bitter and ruins everything you've built.
- Cumin, smoked paprika, chili powder (1/2 tsp, 1/4 tsp, 1/4 tsp): These three are your flavor compass pointing toward Tex-Mex instead of just melted cheese—don't skip them or substitute carelessly.
- Kosher salt and black pepper: Taste as you go because cheese is already salty and you don't want this becoming unpleasantly briny.
Tired of Takeout? 🥡
Get 10 meals you can make faster than delivery arrives. Seriously.
One email. No spam. Unsubscribe anytime.
Instructions
- Build your flavor base:
- Melt butter over medium heat, then add the red onion and jalapeño, stirring until they turn translucent and fragrant—this usually takes about two minutes, and you'll know it's ready when the kitchen smells like it could be a Tex-Mex restaurant.
- Wake it up with garlic:
- Add minced garlic and cook for just thirty seconds, stirring constantly so it perfumes the butter without scorching into bitter flakes. The smell will tell you exactly when it's done.
- Create the creamy base:
- Pour in the milk and add cream cheese, whisking steadily until the cream cheese dissolves into the milk like it was never separate—this happens faster than you'd expect, maybe a minute of focused whisking.
- Add the cheese slowly:
- Sprinkle in the cheddar and Monterey Jack gradually while stirring constantly, letting each handful melt before adding more. This prevents clumping and keeps the texture silky instead of gritty.
- Season with intention:
- Stir in cumin, smoked paprika, chili powder, salt, and pepper, tasting as you go because once you've added too much, there's no taking it back. The mixture should smell warm and slightly spicy, not aggressively hot.
- Finish with freshness:
- Add the diced tomato and stir gently for about a minute to warm it through without breaking it apart. This adds brightness and a slight textural contrast that makes people realize there's more going on than just cheese.
- Keep it warm and ready:
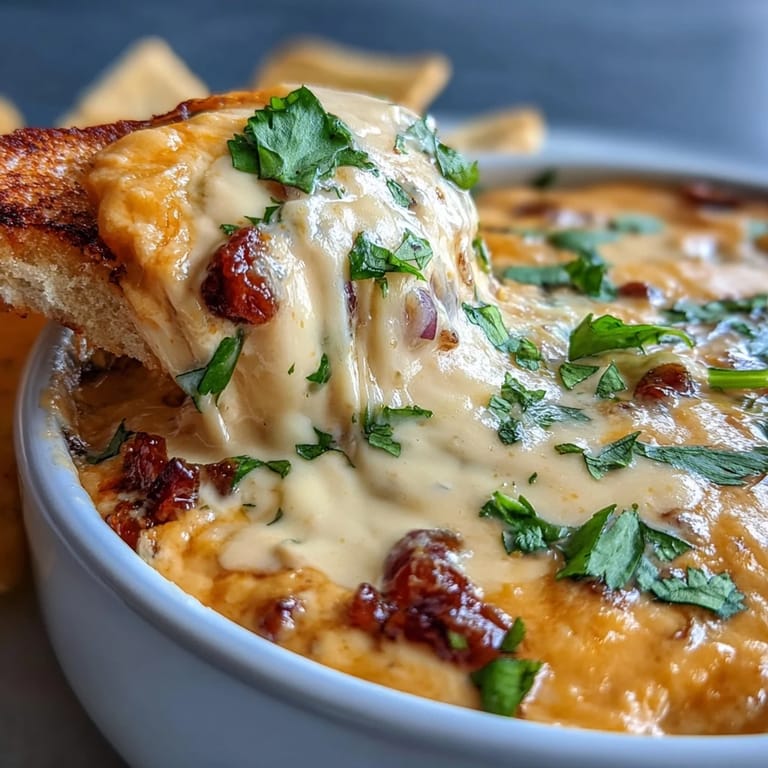
- Transfer to a serving bowl or slow cooker set on warm, which prevents the bottom from scorching while the top stays perfectly dippable. A slow cooker is your best friend here if you're serving a crowd.
 Save
Save The moment that really got me was when my eight-year-old nephew tasted this and asked why restaurant queso dip wasn't this good. I realized I'd been overthinking it, chasing complexity when actually the answer was simply using real cheese and not rushing the process. Sometimes the best kitchen victories are the simplest ones.
The Cheese Question
I've tested this dip with pre-shredded cheese from bags, and while it technically works, the dip never achieves the same silky texture because of the anti-caking agents they add. Block cheese that you shred yourself melts so much more smoothly that it's worth the thirty seconds of grating. If you're in a true pinch, pre-shredded works, but you'll notice the difference and probably wish you'd taken those extra moments.
Keeping It From Thickening
Cheese naturally wants to seize and thicken as it cools, which is why cream cheese and milk are doing heavy lifting in this recipe. The cream cheese acts like a buffer, keeping everything creamy even if the dip sits for a bit, and the milk ensures there's always enough liquid to keep it pourable. A slow cooker on warm is genuinely magic for this—it maintains the perfect temperature without any risk of the bottom scorching while the top cools.
Customizing Without Losing Your Way
I've been tempted to add everything from chorizo to roasted poblanos, and the truth is you can—this base is forgiving enough. The key is respecting the original proportions of cheese and liquid, because that's what keeps this dip actually dippable instead of turning it into something you'd need a spoon for. Think of it like jazz; you can improvise, but you need a solid foundation first.
- For heat seekers, leave the jalapeño seeds in or stir in a quarter teaspoon of cayenne pepper—taste and adjust so the heat builds gradually instead of hitting like a wall.
- If you want it more indulgent, substitute a quarter cup of the milk with heavy cream and watch the dip become almost sinfully rich.
- Fresh cilantro and green onions as garnish make it look intentional, but honestly the dip is so good that you could serve it plain and nobody would complain.
 Save
Save This dip has become my answer whenever someone asks what to bring to a gathering—it's quick enough that I'm not stressed, and reliable enough that I know it'll disappear. That's the kind of recipe worth keeping.
Recipe FAQ
- → Can I make this queso dip ahead of time?
Yes, you can prepare the queso dip up to 2 hours in advance. Keep it warm in a slow cooker on the warm setting to maintain its creamy consistency. If it thickens, stir in a splash of warm milk to restore the smooth texture.
- → How do I make this queso dip spicier?
To increase the heat, leave the jalapeño seeds in, substitute pepper jack for part of the cheddar, or add a dash of hot sauce. You can also include diced serrano peppers or a pinch of cayenne pepper for extra spice.
- → What's the best way to keep queso dip from separating?
Use low to medium heat and stir constantly while adding the cheese. Avoid high temperatures, which can cause the proteins to separate. Adding the cheese gradually and using whole milk with cream cheese helps maintain a smooth, stable emulsion.
- → Can I use different types of cheese?
Absolutely! While sharp cheddar and Monterey Jack create the classic flavor, you can experiment with pepper jack for heat, white American cheese for extra creaminess, or queso quesadilla for authentic Tex-Mex flavor. Avoid pre-shredded cheese with anti-caking agents for the smoothest results.
- → What should I serve with queso dip?
Tortilla chips are the traditional choice, but this versatile dip also pairs wonderfully with pretzel bites, fresh vegetable sticks like bell peppers and celery, pita chips, or even spooned over nachos, tacos, and baked potatoes.
- → How long does leftover queso dip last?
Store leftover queso in an airtight container in the refrigerator for up to 3 days. Reheat gently on the stovetop over low heat or in the microwave in 30-second intervals, stirring frequently. Add a splash of milk while reheating to restore the creamy consistency.